


Unit 5: WordPress Installation and Customization
Introduction:
WordPress is famed (mostly by its own developers) for its easy installation. If you are signed up for the WordPress hosted service, installation is not required. However, if you are self-hosting WordPress, then there are a few easy steps to follow for getting the software up and running. You will need some basic knowledge of domains and hosting. Knowledge of HTML and PHP are also beneficial, though not necessarily mandatory.
Here is a quick overview of some helpful WordPress resources:
- Blog Like a Pro: Tips for optimizing your WordPress blog and using its features effectively.
- Essential Pages: Must-have pages like Home, About, and Contact Us for every WordPress site.
- Essential Block Editor Tips: Practical tricks for using WordPress's Block Editor to save time and enhance content creation.
- Security Tips: Key strategies to protect your WordPress site from threats in 2024.
These resources can help improve your blogging, site structure, and security.
In the upcoming Zoom classroom tutorial, I will show you how to do a quick installation of WordPress on your hosting account. As mentioned earlier, you will need to create a self-hosted solution for this course, as opposed to only a simple account at wordpress.com because you will have far more liberty in customizing the program and extending its functionality that way. Further, wordpress.com is more of a testing ground for the main WordPress software, and therefore the former's interface changes very often, and this can lead to a lot of confusion. Keep in mind, that in order to work with a self-hosted version you need to have a domain and hosting account. It is essential that you contact me in advance if you have any questions about this, or are having difficulty obtaining a hosting account for whatever reason.
See you in Zoom classroom!
Graded Assignments
Unit 5
Though we want you to eventually create a self-hosted WordPress installation, for now let's have you create a hosted option for this exercise.
- Create a WordPress hosted account at www.wordpress.com. To do so, click "Get Started" on the top, right-hand corner of the website, and follow the prompts to create a new account.
Note: When searching for a domain name, be sure to select the "Free" plan. Below is an example. Please search for a domain name that reflects the genre of your blog.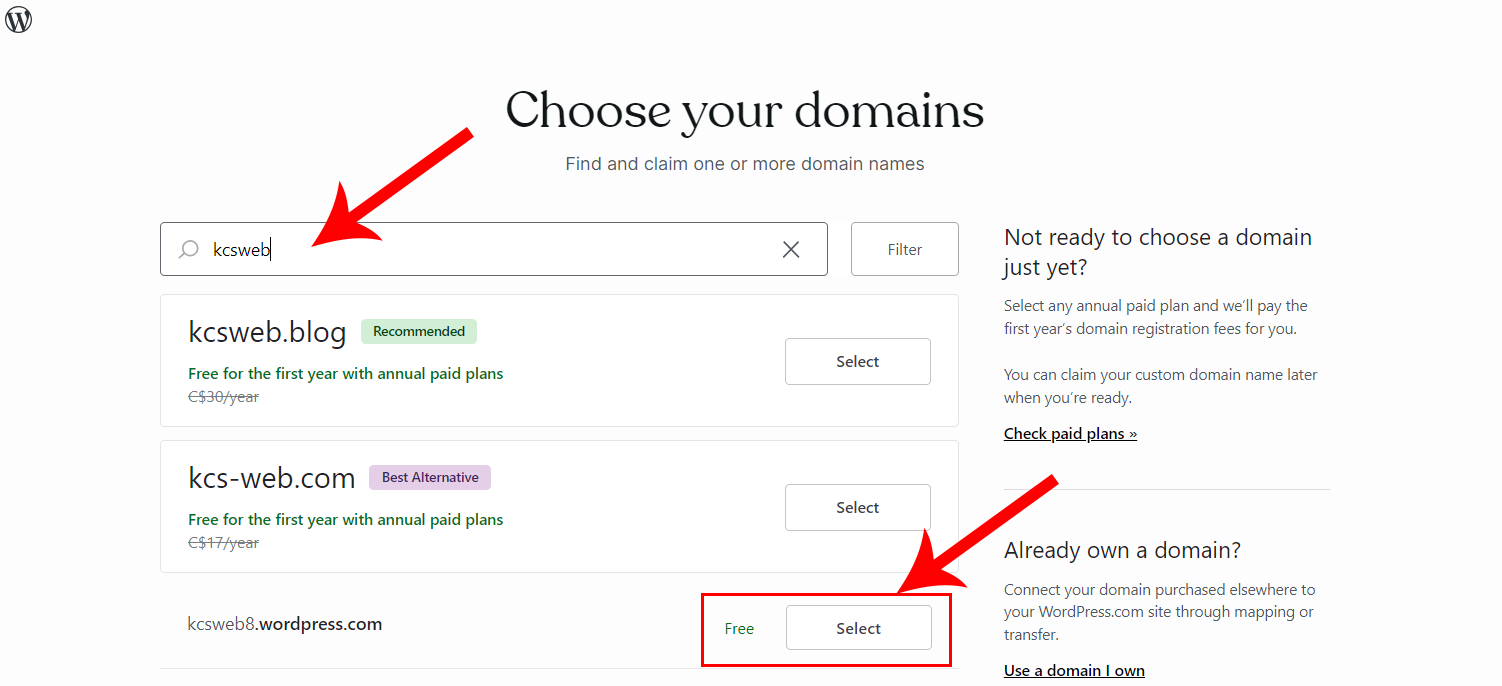
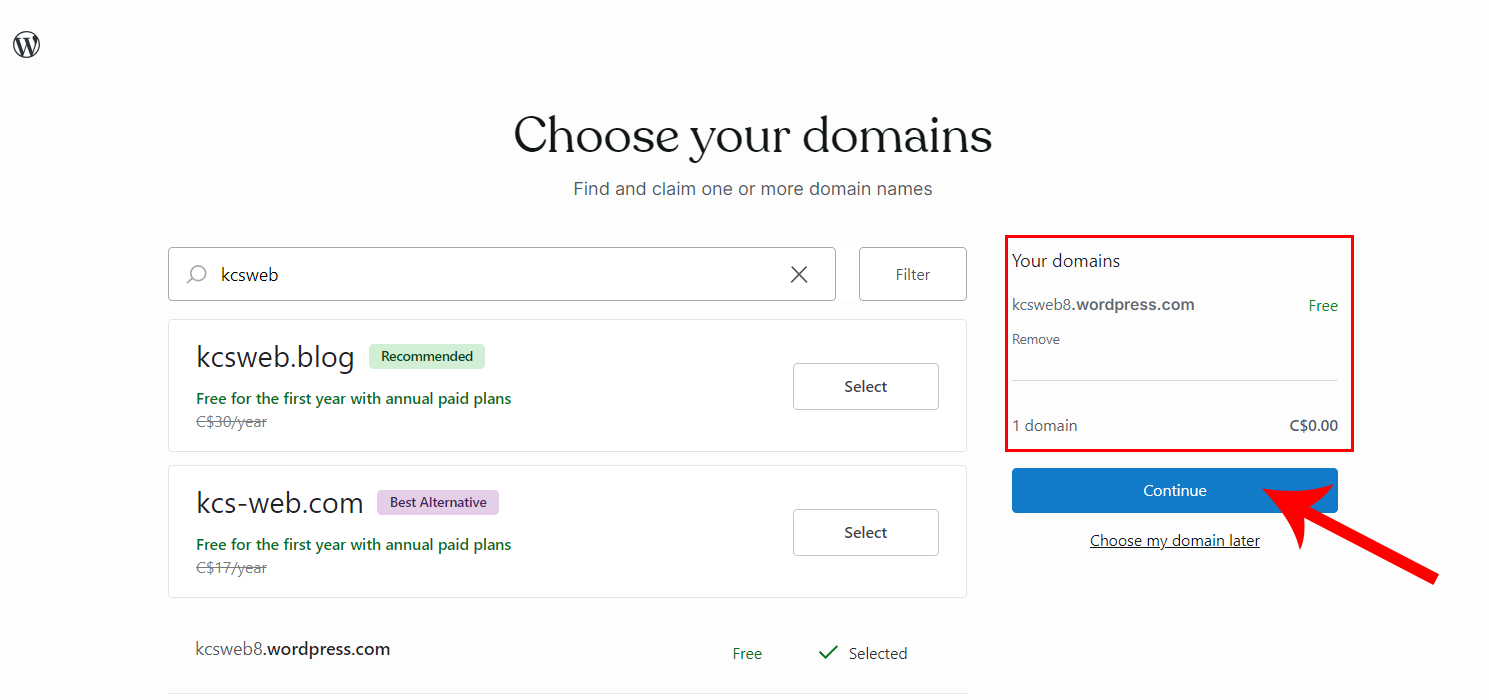
Notice that the new WordPress account is free of charge. Click the Continue button to proceed.
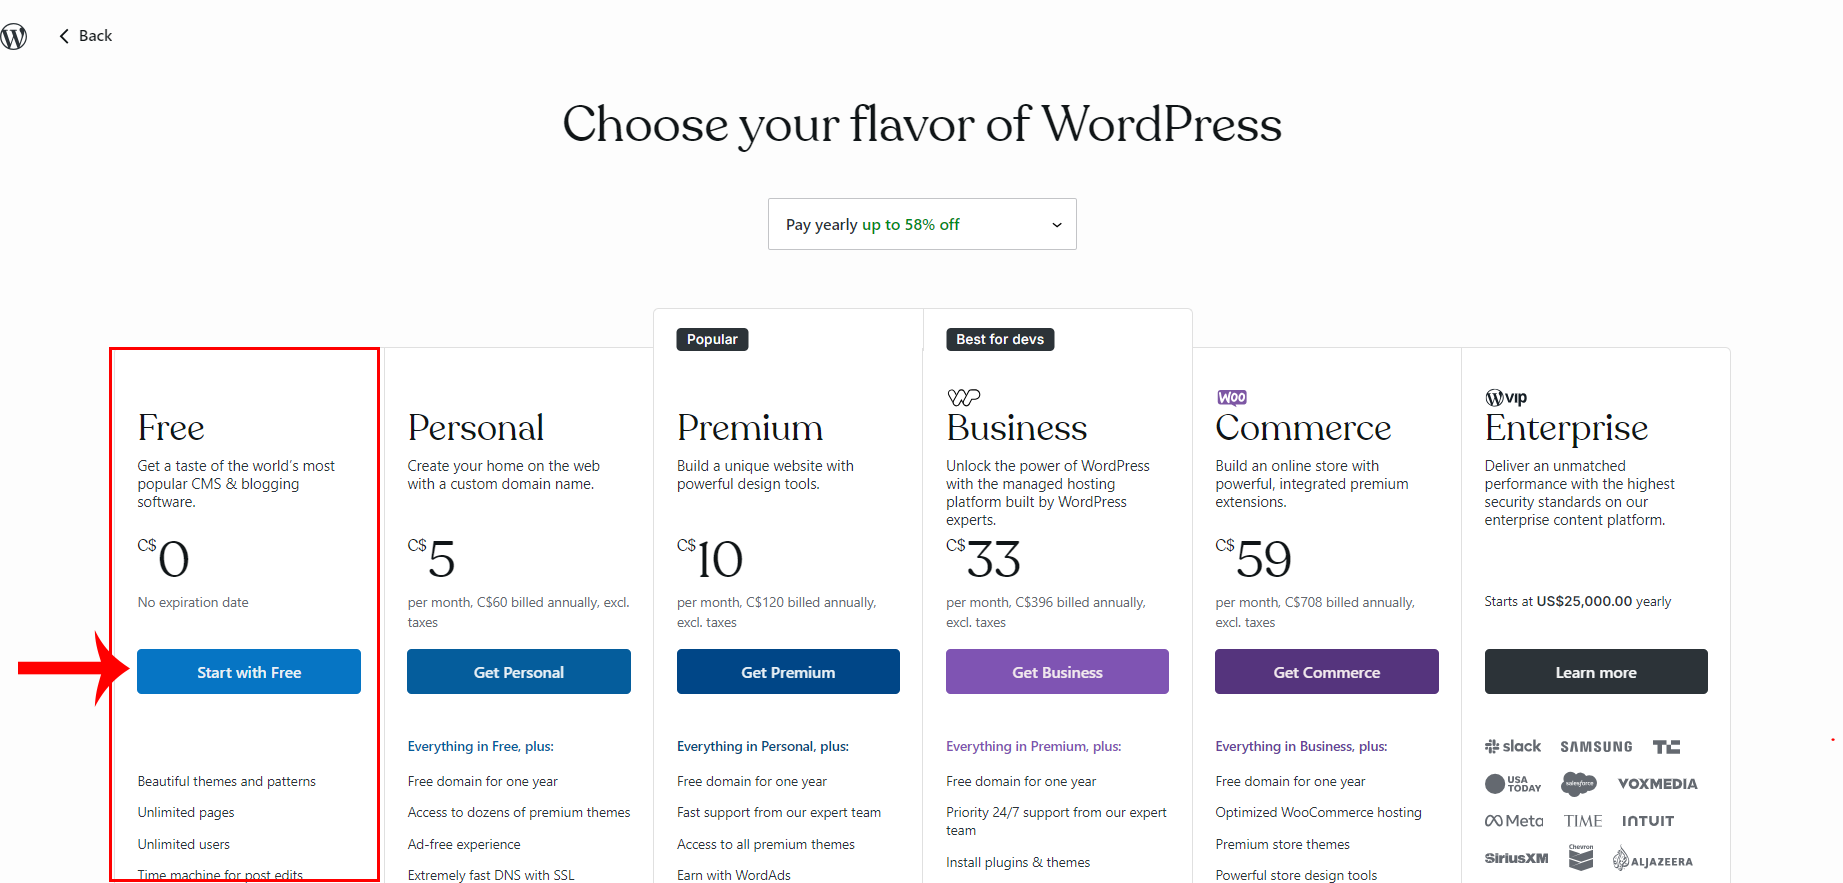
Click the Start with Free button to create a free WordPress account.
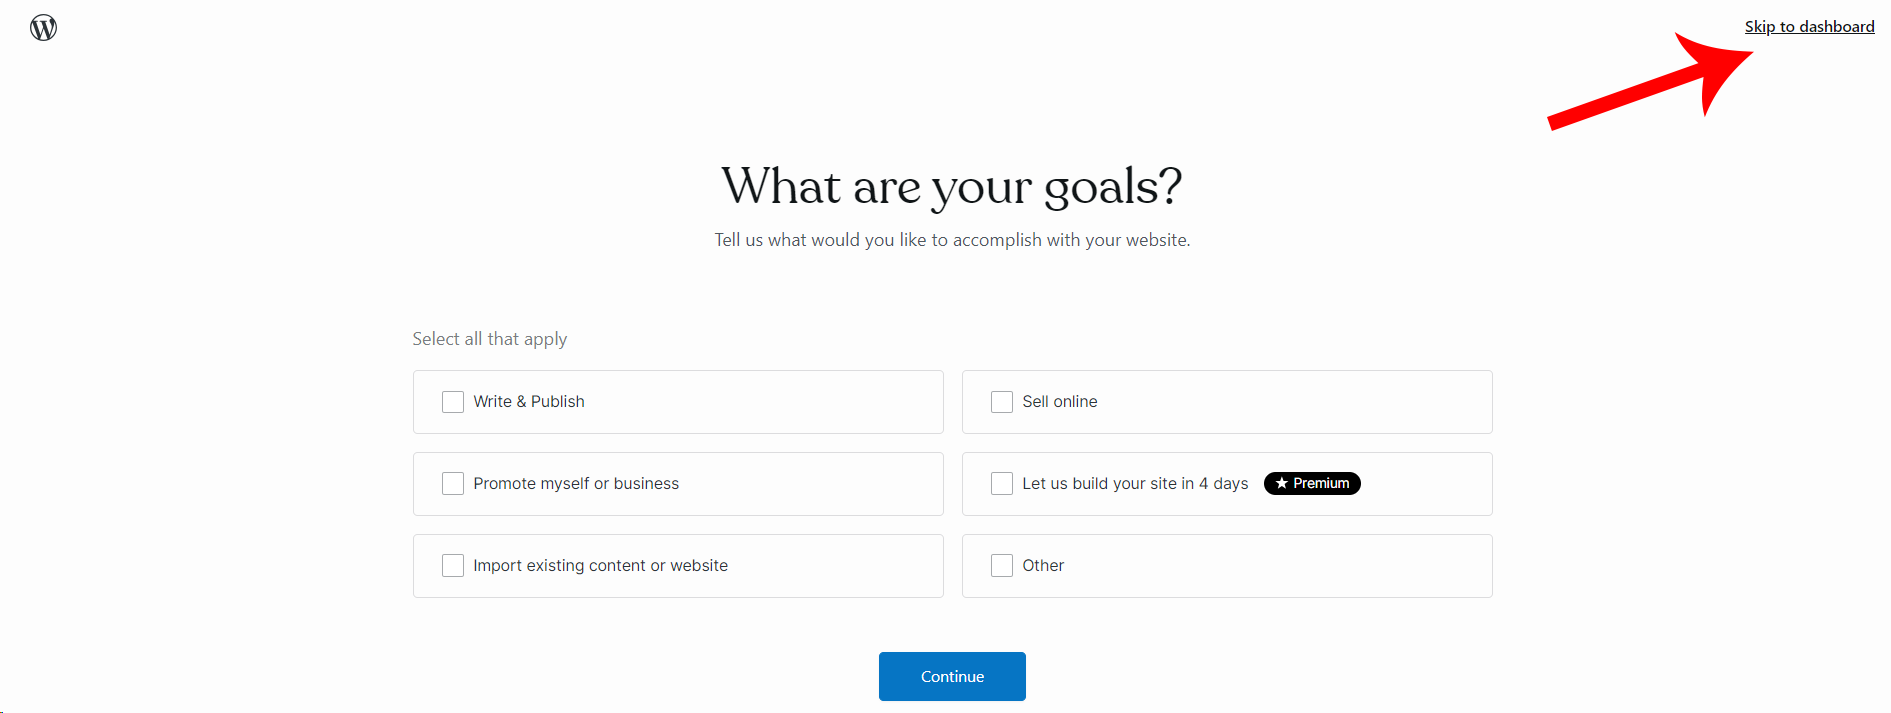
Click the Skip to dashboard link on the top, right-hand corner of the browser.
 Note: Before you can invite another person to your site, you must verify your email address. WordPress will send a welcome email to you after you create your account. Go ahead and confirm your email using this email. Notice that your username and email address will be displayed in the yellow-highlighted areas shown below.
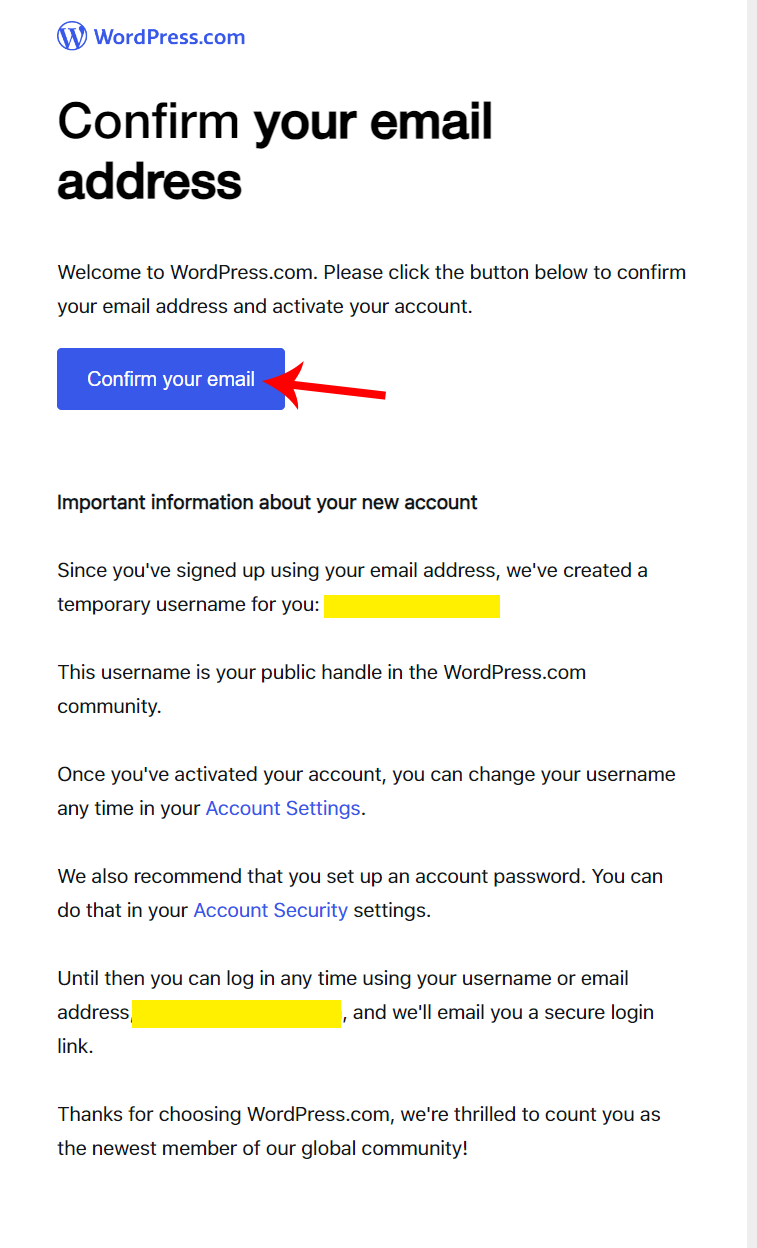
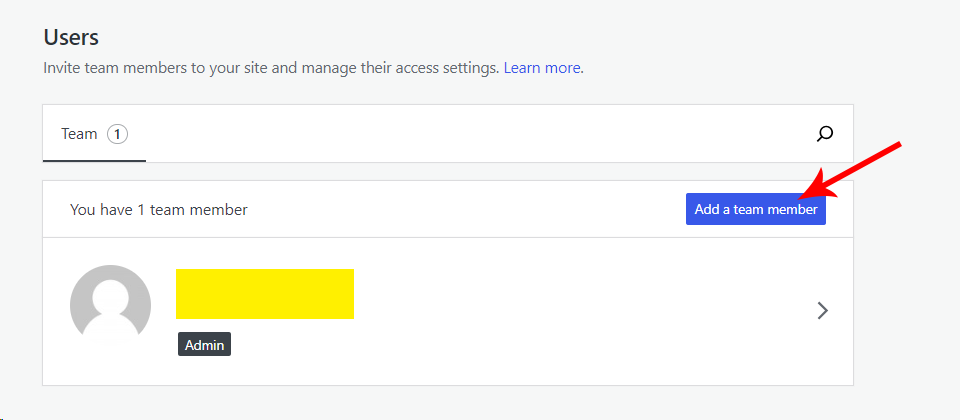
- Make Colin an administrator by navigating to Users, and clicking the Add a team member button.
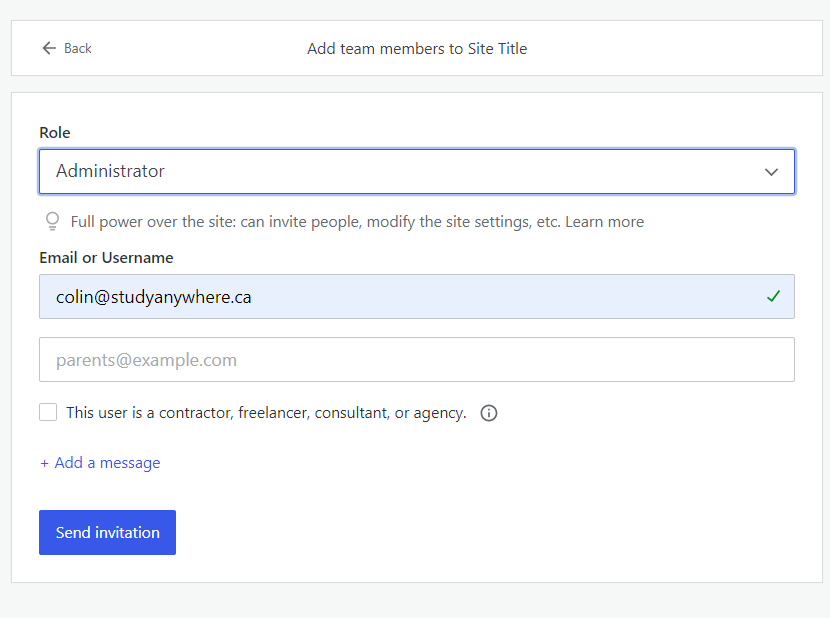
- Select the Role as Administrator, enter colin@studyanywhere.ca as the email, and click the Send invitation button.
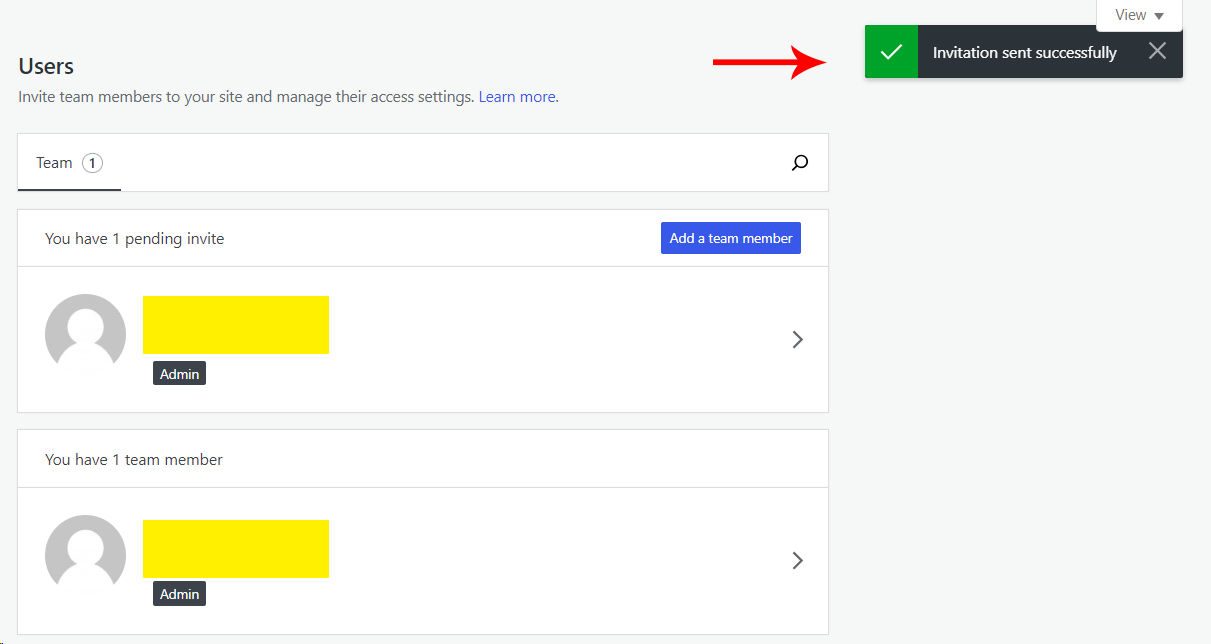
- You should see the Invitation has been sent successfully and Colin is now added as a user with his username as well as your username, which will be displayed in the yellow-highlighted area.
- Then go to Moodle and post the link to your blog.
Note: Once you have completed this assignment, please ensure that you begin working with only the self-hosted installation of WordPress. Colin will be demonstrating this installation during the second Zoom classroom session of this course. Feel free to post this info to Moodle.