


Chapter 3 Exercises
Exercise 3: Receiving Data from a Form in PHP
Now that you have created a basic HTML form, you need to write the handle_form.php script that will receive and process the data generated by the feedback.html page. In this exercise the PHP script will simply repeat what the end user enters into the form. In WDT204: SQL and Advanced PHP you will learn how to take this information and store it in a database or send it in an email.
For many of you, this exercise will be surprisingly simple and the script will work flawlessly. But some of you may encounter a hiccup or two, thanks to major changes in PHP’s default configuration. In many PHP installations you can access form values by taking the name attribute of the various inputs and adding a dollar sign to create the variable. In this exercise variables will be $title, $name, $email, $response, $comments, and $submit.
You will now write the PHP script using this standard method, which will work for many of you. If it doesn’t, then this leads nicely into the debugging techniques covered in later exercises. So, as a heads up, if you see unexpected results with this exercise, don’t worry. Exercises 4, 5, and 6 will explain everything and convey some valuable lessons in the process.
Note: A number of Helpful Tips are located at the end of this web page for reference as you complete this exercise.
To create the PHP script:
Script 3-4: By taking the value of the name elements in the HTML form and adding a dollar sign, you create variables that contain the values the user entered in the corresponding form fields.
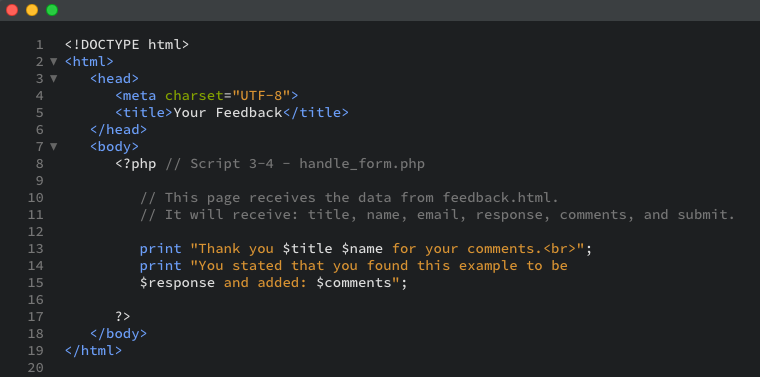
- To begin, create a new PHP script starting with the HTML code with the title Your Feedback (Script 3-4):

- Insert the opening PHP tag and add any comments:

Here you add comments to the script to remind yourself of its purpose. While the feedback.html page indicates where the data is sent (via the action attribute), a comment here indicates the reverse (from where this script is getting its data). - Print out the user information:

Again, to access what the user typed into the Name input box, you refer to the $name variable. The same applies to all the other form inputs, regardless of their type. - Close the PHP section and complete the HTML page.

- Save the script as handle_form.php to your XAMPP folder (c:\XAMPP\htdocs\202\chapter3).
- Using Cyberduck, upload the file to the production server, and test in your browser (Figures 3-8 and 3-9), making sure you are looking at the production server version of the file, and ensuring it is saved in the same location as feedback.html.
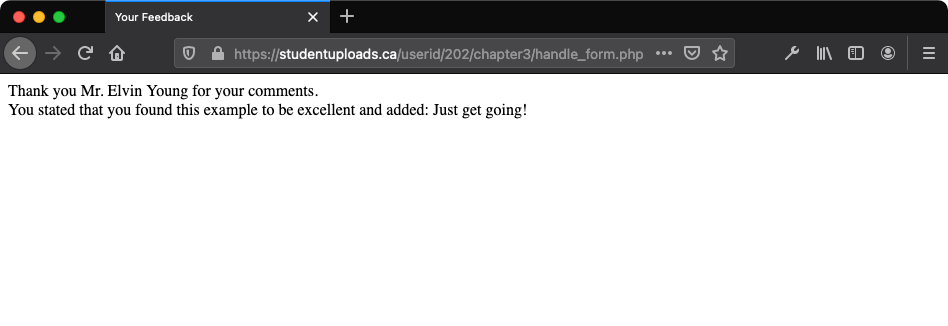
Figure 3-8: Whatever the user enters into the HTML form should be printed out to the browser by the handle_form.php script (see Figure 3-9).
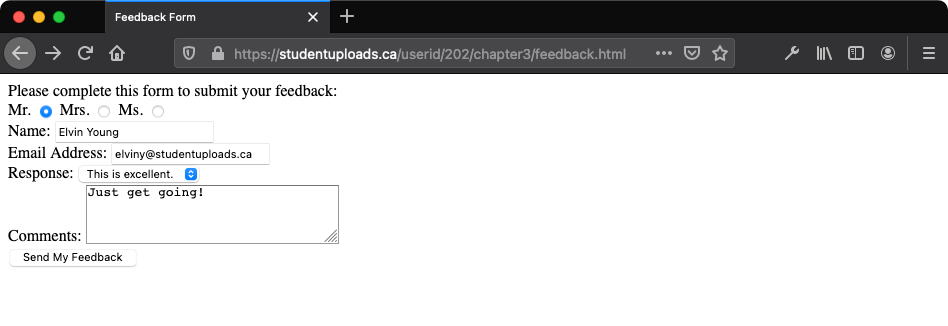
Figure 3-9: This is another application of the print statement discussed in Chapter 1, but it constitutes your first dynamically generated web page.
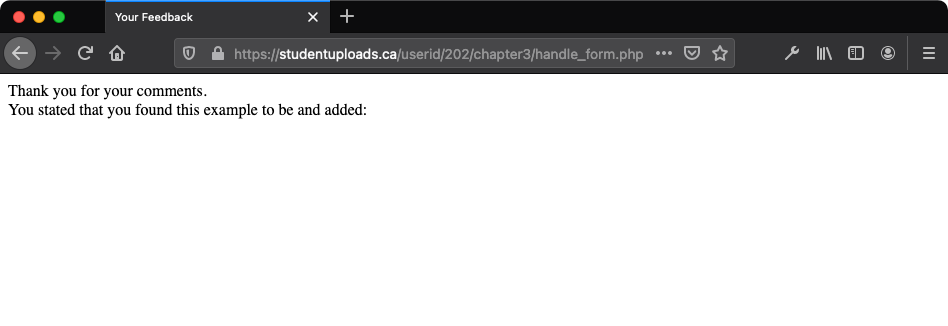
- If the values of the variables are not printed when you run the script (Figure 3-10), or if they are not printed and you also see error messages, you are seeing the hiccups we mentioned earlier. Some of you may even see nothing at all (a blank page). Please continue reading the next three exercises for the appropriate solutions.
Figure 3-10: If the page does not display the submitted information, read Exercise 6: The Register Globals Problem.
Important: If something doesn’t look right in your document, and you need to make changes to the script, follow the editing procedure using Synapse outlined in Chapter 1.

- If you want to pass a preset value along to your script, use the hidden type of input within your HTML form. For example, the line

inserted between the form tags will create a variable in your handling script called $this_page with the value feedback.html. - Notice that the value of radio button and select menu variables is based on the value attribute of the selected item (for example, excellent in the select menu). This is also true for check boxes. As you saw, for text boxes, the value of the variable is what the user typed.
- Even the submit button is sent to the receiving page as a variable.
- If the handle_form.php script displays extra slashes in submitted strings see Chapter 5, Using Strings, and in particular the exercise on Combatting Magic Quotes.
- You should know that the method of handling form data demonstrated here (referring to $name, $title, etc.) is not the preferred method and can introduce some security risks—although it can work, obviously. Rest assured that you will learn better, more secure methods soon, but we wanted to keep things simple for the time being.