Exercise 1: Creating a Simple Form
In this exercise you will create an HTML feedback page that takes the user’s title, name, email address, response, and comment. You will need to create the necessary fields with this in mind.
Remember that we are using HTML in this course.
Note: Please create the form in HTML. Note that the form in Script 3-1 below is created in HTML.
Note: A number of
Helpful Tips are within this web page for reference as you complete this exercise.
To start a basic HTML form:
Script 3-1: Every HTML form begins and ends with the <form> </form> tags. When you are hand-coding forms, take care not to forget either one. Also be sure to direct the form to the proper handling script using the action attribute.
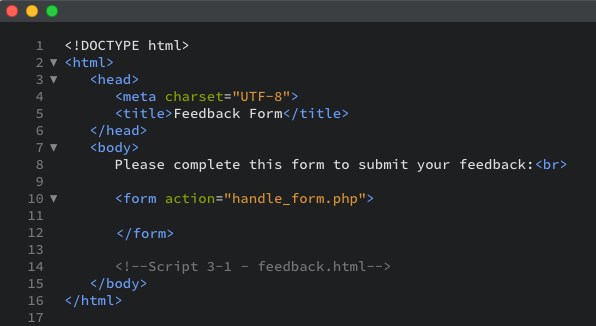
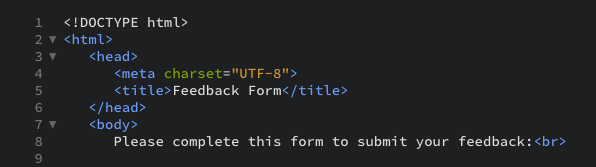
- To begin, create an HTML document with the title Feedback Form (Script 3-1):
- Add the opening and closing <form> tags:

The <form> tags dictate where a form begins and ends. Every element of the form must be entered between these two lines. The action attribute tells the server which page (or script) will receive the data from the form and is one of the most important considerations.
- Complete the page with the closing body and HTML tags.

- Save the page as feedback.html to your XAMPP folder (c:\XAMPP\htdocs\202\chapter3).
- Using Cyberduck, upload the file to your production server, and test it in your browser.
- Close the file you had open in Brackets.
- Using Synapse to connect to the production server, open feedback.html again. This time, the file you should have open in Brackets should be the one from the production server. Check the file path at the top of Brackets to make sure you are working with the production server version of the file

- Note that you use the HTML extension (.html) here because this is a standard HTML page (not a PHP page). Interestingly, you could use the .php extension, even though there is no actual PHP code, and this would not present a problem. (Remember that in a PHP page, anything outside of the PHP brackets—
—is assumed to be HTML.)
- Be certain that your action attribute correctly points to an existing file on the server or your form will not be processed properly. In this case, you need to indicate that the form should be submitted to handle_form.php, which is located in the same directory as the feedback.html page.
Now that you are aware of the fundamental form tags, you can add the various form elements (inputs for the end user’s name, email address, and so on) to complete the form.
To create form elements:
After the opening form line, but before the closing form tag, press Enter (or Return) to create a new line.
Script 3-2: You can add any combination of input types to your form—just ensure that they are all within the <form> tag, or they will not appear.
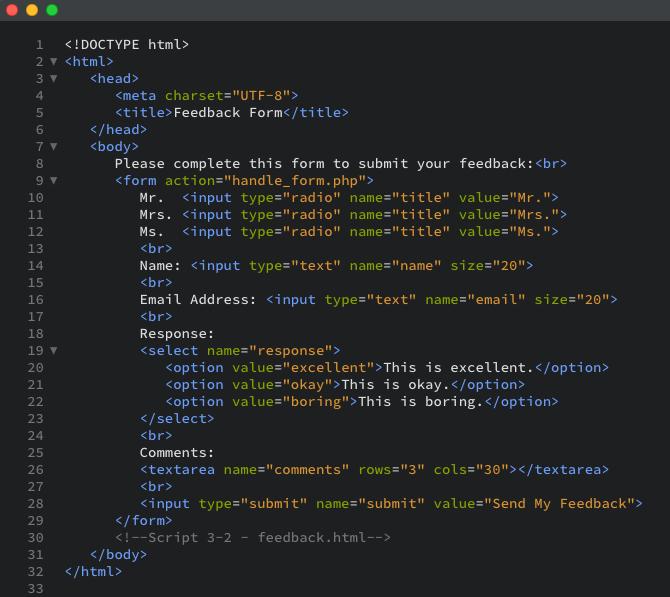
- Add three radio buttons for the user’s title (Script 3-2):

This HTML code creates three radio buttons, which appear as clickable circles (see Figure 3-1). Because all three buttons have the same name value, only one can be selected at a time. Per HTML5 rules, the code is in lowercase except for the values, and an extra space and slash are added to the end of each input to close the tag. In the interest of spacing out the form, the <br> tag is added at the end.
Figure 3-1: The title radio buttons.

- Add text inputs for the user’s name and email address:

Use a consistent naming convention within your form by giving each field a logical and descriptive name. Use letters, numbers, and the underscore (_) when naming fields. These text inputs display text boxes in the browser (Figure 3-2).
Figure 3-2: Text input creates boxes like these.

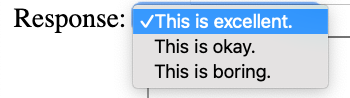
- Add a select menu for a response:

You have added a response drop-down menu here to get experience with another popular form field type, the select menu (Figure 3-3). Each option listed between the select tags is an answer the user can choose.
Figure 3-3: The select tag creates a drop-down menu.
- Add a textarea to record the end user's comments:

A textarea field (Figure 3-4) gives the end user more space to enter their comments than with a text field. However, using a text input you can limit how much information the user can enter, which is not possible with textarea (not without using JavaScript, that is). When you are creating a form, choose input types appropriate to the information you wish to retrieve from the user.
Figure 3-4: The text area tags generate a larger text box.

- Add the submit button:

The value attribute of a submit type is what appears on the button in the web browser (Figure 3-5). You could also use Go! or Enter, as examples.
Figure 3-5: Every form needs to have a submit button, which may look different from one browser to another.

- Save the page, again as feedback.html. Since you have opened this page straight from the production server using Synapse, your changes will be applied right on the production server by simply pressing Ctrl-S (Cmd-S on a Mac). This means that you don’t need to use FTP.
- Switch over to your browser, and test the file there (Figure 3-6). Make sure you are looking at the production server version of the file, and that you have refreshed to ensure that you are looking at the latest iteration.
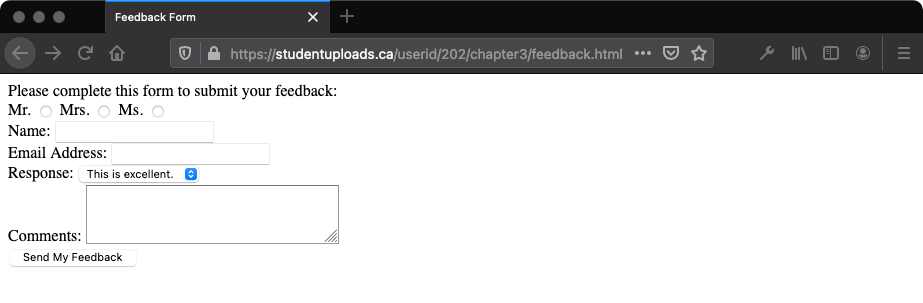
- Figure 3-6: If you have prepared the form correctly, it should look like this in your web browser.
Important: If something doesn’t look right in your document, and you need to make changes to the script, follow the editing procedure using Synapse outlined in
Chapter 1 .
← Return to Chapter 3, Assignments Page